
Installing takes about five minutes: download, run the installer, set one Resolve preference, sign in. Check the requirements first. You need DaVinci Resolve Studio, because the free version can't run plugins.
1. Download
The plugin is part of your reelport.io account, so you download it signed in:
- macOS: reelport.io/download
- Windows: reelport.io/download/windows
You get one zip (Reelport-<version>.zip, or Reelport-<version>-windows.zip). Unzip it anywhere, for example in Downloads. Release notes for every version are on updates.reelport.io.
2. Run the installer
macOS
- Quit DaVinci Resolve.
- Double-click
install.commandin the unzipped folder. If macOS says it can't verify the file, right-click it, choose Open, then Open again. - Type your Mac password when the Terminal window asks. Resolve loads plugins from a system folder (
/Library/Application Support/Blackmagic Design/DaVinci Resolve/Workflow Integration Plugins), and only an administrator can write there. - The installer copies the free fonts the editing styles use to
~/Library/Fonts, skipping any you already have. - It asks Add Reelport to Claude too? Press Return to open the Claude extension in Claude Desktop, or type
nto do it later from the panel. See Editing with Claude.
The installer stops with "DaVinci Resolve Studio was not found" if only the free Resolve is installed.
Windows
- Quit DaVinci Resolve.
- Double-click
install.cmdand click Yes on the admin prompt. Resolve loads plugins fromC:\ProgramData\Blackmagic Design\DaVinci Resolve\Support\Workflow Integration Plugins. - The fonts go into your own fonts folder (no admin needed), and the installer offers to add Reelport to Claude, just as on macOS.
- Install 64-bit Python 3.10 or later from python.org with Add python.exe to PATH ticked, if you don't have it. Resolve's scripting needs it.
More on Windows, and on Linux, in Windows and Linux.
3. Turn on scripting in Resolve
Open DaVinci Resolve › Preferences › System › General and set External scripting using to Local. Save, then restart Resolve. Without it, Claude can't talk to Resolve. The panel still works, but its Tools tab doesn't.
4. Open the panel and sign in
- In Resolve, open Workspace › Workflow Integrations › Reelport. The panel opens in its own window next to Resolve.
- On the first start, a short tour shows what the panel does. Then click Sign in with reelport.io.
- The panel shows a code like
ABCD-EFGHand opens reelport.io/device in your browser. - Sign in to reelport.io (or create an account), check that the code matches, pick the team the plugin should use, and click Connect Reelport.
- The panel notices within a few seconds and shows your channels.
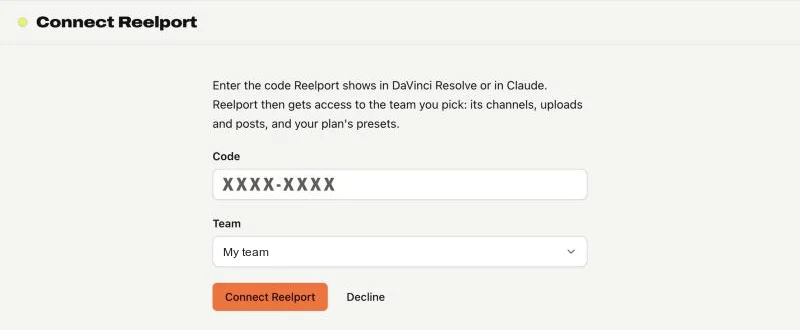
The code is valid for 15 minutes. If it runs out, click Sign in again for a new one. The sign-in stays on this computer: in the macOS Keychain, or in a DPAPI-encrypted file on Windows. Claude signs in the same way, with its own code, the first time you use it.
No browser handy? Under Or use an API token, paste a token from reelport.io › Settings › API tokens instead.
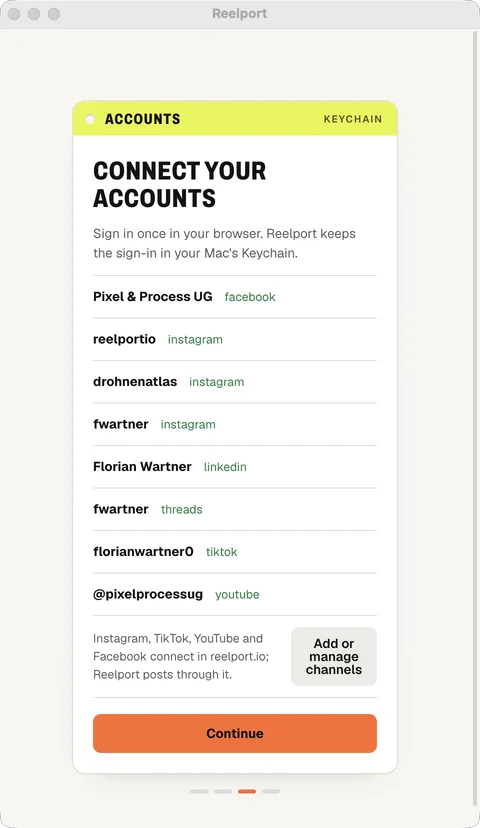
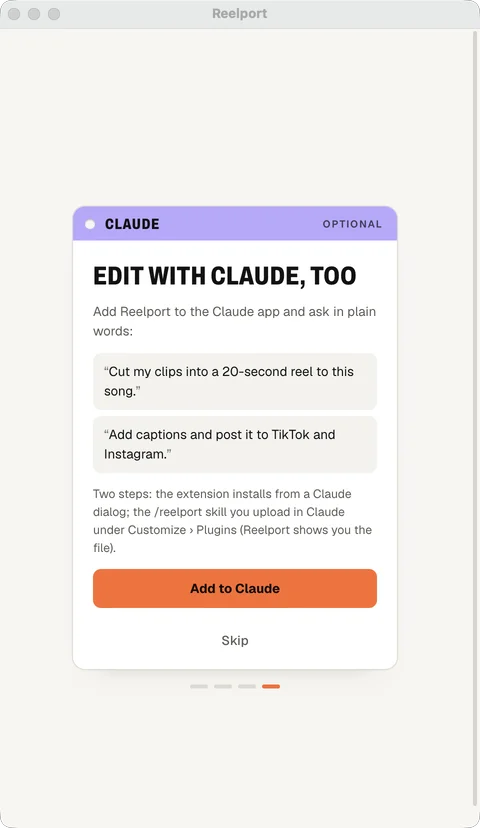
After sign-in the setup guide lists the channels your team has connected. Add or fix channels on reelport.io › Channels; the panel picks them up on its next refresh. Then it offers Add to Claude (you can skip it), and you're set.
Plans and trial
The plugin uses your team's reelport.io plan; there's no separate licence. Your personal team starts with a 7-day trial of every feature, no card needed. The plan decides:
- how many channels, posts and uploads you get (the same limits as on the web);
- which editing tools, caption looks, motion titles and colour looks the panel shows and Claude can use. A tool outside your plan answers with a short upgrade note.
Creator includes a starter set of looks without director mode and variations; Pro, Agency and the trial include everything. The full table is on Plans and limits. Change your plan from the panel's Account › Manage plan, or under Billing.
Permissions on macOS
The first time Reelport reads footage from a card, an external drive, Desktop, Documents or Downloads, macOS asks whether Claude (or Resolve) may access it. Click Allow. You can change it later under System Settings › Privacy & Security › Files and Folders. In Claude, "reelport self test" lists every folder and drive Reelport can't read yet.
Updates
The panel checks updates.reelport.io when it starts and shows What's new when there's a new version. Click Update now: the update is signed and its checksum is checked before it installs (on a Mac it asks for your password, like the installer). Then click Close Reelport and open it again from Workspace › Workflow Integrations. You can also check by hand under Account › Check for updates.
To reinstall, download the zip again and run the installer. Your sign-in, brand kit and saved choices stay.
Uninstall
- Panel: delete the
com.pixelandprocess.reelportfolder from Resolve'sWorkflow Integration Pluginsfolder (paths above), then restart Resolve. - Claude extension: Claude Desktop › Settings › Extensions › Reelport › Uninstall.
- Claude plugin: Claude › Customize › Plugins › Reelport › remove.
- Sign-in: in the panel, Account › Sign out of this Mac first, or in Claude say "sign out of reelport".